EVM lambda
Insert your own code into blockchain execution by adding hooks to intercept executions and writing your own code in callbacks
Summary
The EVM lambda component opens an IDE in which you add hooks to intercept executions and run the code you write in callbacks. It's the central component of sim Studio.
For some applications (e.g. emitting transient values from a single contract), the Patch component is a good alternative to the EVM Lambda. Read more about how the two compare here.
Inputs
There are four categories of state associated with the EVM lambda component:
- Hooks that specify which blockchain executions to intercept
- Schemas that define the shape and types of records you wish to emit
- Interfaces that you add to interact with contracts as part of your inserted execution
- Callback/probe code that runs when hooks intercept targeted executions
Hooks
When you first enter the EVM lambda component, you're prompted to add a hook. Select from one of the six types. For some types, there's an additional Configure step that requires additional inputs (e.g., the address for an address book) and gives more detail on what you can do with that hook type.

Finally, there's an Add step where you choose the precise hook you need. You can filter the available hooks by subtype (e.g., Log, Function, etc.) or search by name as we've done below with transfer, showing all of the relevant hooks available on USDC. Select a hook by clicking on it. In the right pane, define whether you want to run your yet-to-be-written callback code before or after the execution intercepted by the hook (in this case a transferFrom call) and name your callback, or use the default. There's also an option to auto-generate (and auto-populate) a schema.
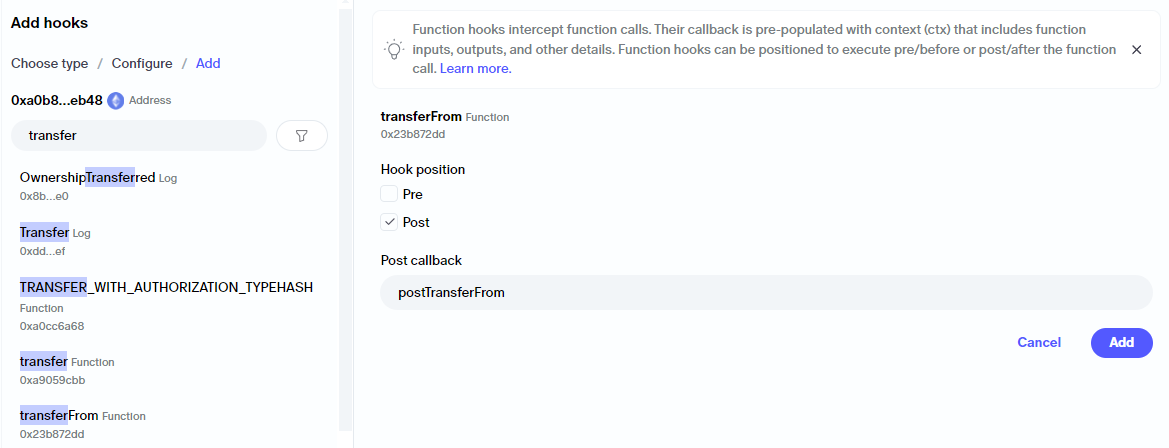
Hit Add and you'll be taken to the main view of the EVM lambda, with the Added list at the left and the code editor to the right.
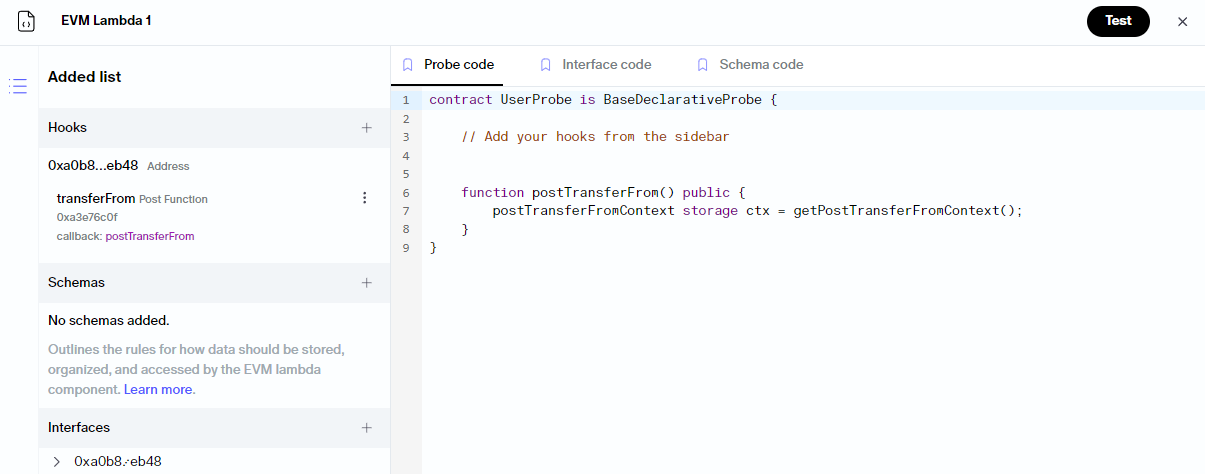
Hook context (ctx) and simFunctions
When you add a hook, the callback comes prepopulated with a context (ctx) object that exposes key details associated with the hook. The context object will differ depending on the hook type and hooked function/log or storage.
Generally speaking:
- Storage hooks will have: valueBefore, valueAfter (of the storage slot that was changed), and information about the storageKey/path to it and the ctx.txn object
- Log hooks: all the decoded data of the logs, and the ctx.txn object
- Function hooks: all the inputs and outputs of the function, the sighash of the function and ctx.txn object
- Transaction hooks: Will contain selected metadata of the transaction like the caller/callee, depth etc. and the ctx.txn object
- Global storage hooks: contain the valueBefore/after of the storage slot in question, the path and the ctx.txn.object
- Block hooks: currently contain no ctx object
You can explore the available details by typing ctx. in the code editor and looking at the options in autocomplete. Note that all members within ctx.txn must be referenced as functions (e.g., ctx.txn.hash() instead of ctx.txn.hash).
Besides the context object, you can also use simFunctions from within your Lambda and patches. simFunctions are abstractions we offer to allow you to perform executions that would be impossible or difficult with just Solidity. For example, you can overwrite the ETH balance of an address in a simulation using simSetBalance. When you add a sim function from the sidebar, it's inserted into the code editor at the location of the cursor. Sim functions are documented at docs.sim.io/reference.
Schemas
Schemas are their own components, separate from EVM lambdas, within a sim Studio canvas. You can read more about them here. However, often you'll want to define your schema while setting up your lambda. To do this, hit the + button to add a schema from the sidebar.
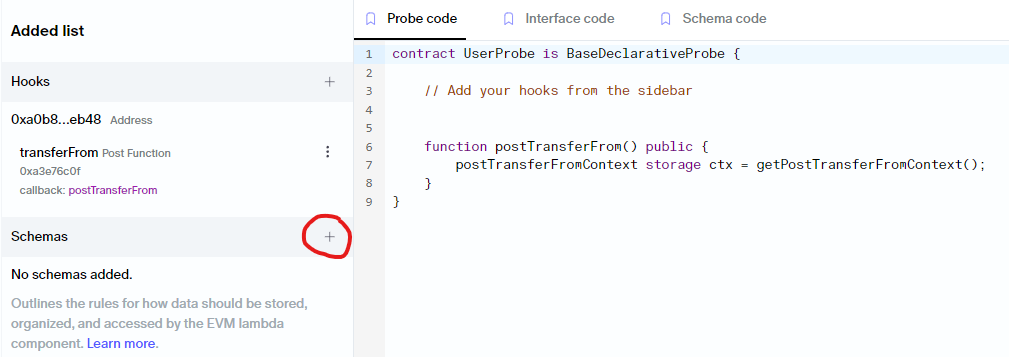
If there are schemas already in your canvas but not connected to your lambda, you can connect them in using the + icon. Otherwise, create a new one with the Create button.
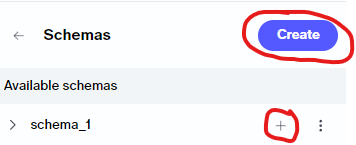
Creating a schema within the lambda component is equivalent to the experience in the schema component: you simply define the name and type of each variable you wish to emit and hit Create.
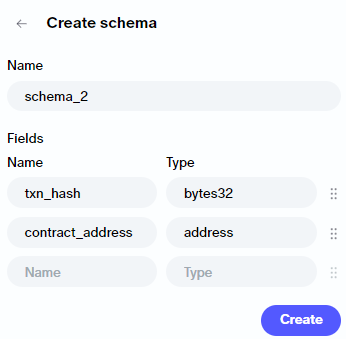
Once you've created a new schema or added an existing one, the schema will appear both in the canvas as a connected component and be available within the IDE. Position your cursor in the position in the probe/callback code in which you wish to emit the record and use the -> button to insert it.
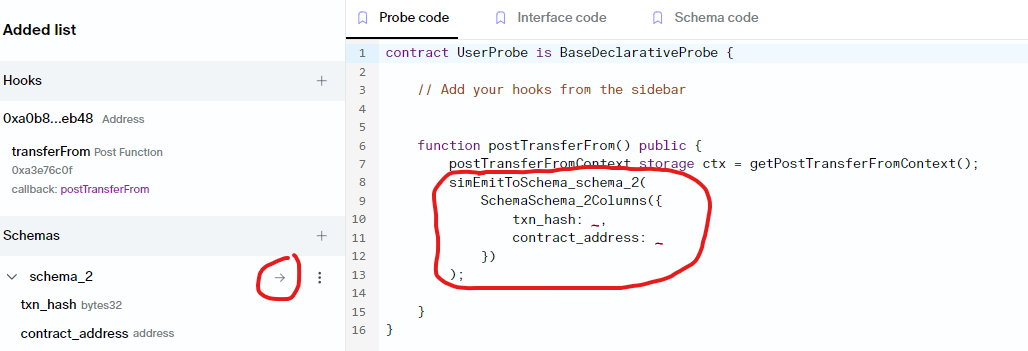
All that remains to have a functional lambda is to populate the values into the schema function. In this case, that's as simple as txn_hash: ctx.txn.hash() and contract_address: ctx.txn.to(). More generally, you can do arbitrarily complex computation within the callback and emit whatever you choose.
Interfaces
If you want to interact with contracts as part of the execution within your callbacks, add an interface from the sidebar. Depending on the hook you choose, an interface may already be added there automatically.
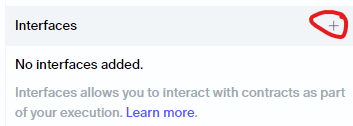
You can import an interface from a deployed contract of your choice or use a known classification (e.g., ERC20). Once added, you can use an interface in your probe code by inserting the function into the code using the -> button.
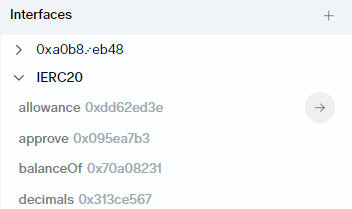
You're given a template if you insert an interface function from a sidebar. The general pattern is as follows:
[Interface_name]([Contract_address]).[Function_name]([Function_inputs)All functions from the ABI will appear in the sidebar and the Interface code tab of the code editor. The default name of the created interfaces is I[contract_address], but it can be renamed to something more convenient in the Interface code tab.
Code editor
Tabs
The code editor has three tabs:
- Lambda code: Main file that defines your execution. It includes the hook callbacks, in which you put your execution logic.
- Interface code: Empty until you add interfaces. When you add an interface using the Interfaces sidebar, all the functions will show here. You can also rename interfaces here if you choose.
- Schema code: A code representation of all connected schemas.
- Schema types: Any struct you define here can be used as a custom type in a schema component .
- Utillity: Allows reusable code, see utility tab section for more.
Testing and console logs
When you're ready to test your code, use the test button at the top-right of the IDE. Define a sample block range on which to test, and hit confirm. The max range you can test on is 16 blocks. This range overrides any range set in connected data source components.
After a few moments, the console will open at the bottom of the screen to reveal logs and/or errors from your test. The logs will include any schema emissions (from simEmitToSchema...() functions) as well as strings included in simConsoleLog() statements in the code.
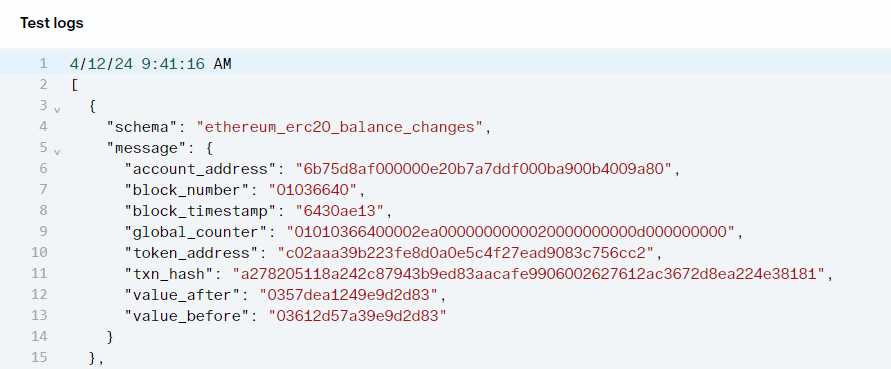
If you run multiple test interactions, the most recent logs will show below older logs, which will be collapsed. There's a clear button at the top right of the console if you clear the console. The console can also be expanded or collapsed by dragging on its edge.
Interactions
EVM Lambda components can be deleted or duplicated. You can open and close the corresponding IDE and test the code using the feature described above.
Allowed edges
Outgoing
- Schema
Incoming
- Data source
- External trigger
Notes
Utility tab
If you want to have reusable code within your canvas it can be defined in the Utility tab of the Lambda. What you define here will be accessible in any of your Lambdas in said canvas.
It's great for reusable functions and constants, but you can also define contracts here. If you inherit the BaseDeclarativeProbe you can also have reusable probe logic .
Example:
contract SharedProbeLogic is BaseDeclarativeProbe {
    // ... shared probe logic like schema emits
}
Note that you then also need to inherit this contract in your Lambda code like below
contract UserProbe is SharedProbeLogic {
    // ... rest of the probe logic
}
Failed transactions
By default we don't emit records from failed transactions. If you'd like to include them, add the following at the top of the contract defined in your lambda code:
constructor(){
	__includeFailedTransactions = true;
}
Stateful lambdas
By default, both EVM Lambda and Patch components have their state reset at each block. The benefit of this is it allows for very fast backfills as we can parallelize block execution. In some cases, however, it's really useful to maintain some state across blocks and you only want to run at the tip (or you're patient enough to tolerate sequential backfill). While it's still a very new feature that we're testing and improving, you can run a stateful lambda as follows:
- Declare a separate
Storecontract for the variables that you want to be stateful. - Use a
/// @custom:sim-stateful-probeannotation above the main lambda contract. - Deploy the store within the constructor of the main contract.
Here's a minimal example (full canvas) of a stateful EVM lambda that increments a counter at each block:
contract Store {
    uint256 counter;

    function increment() external {
        counter++;
    }

    function getCounter() external view returns (uint256) {
        return counter;
    }
}

/// @custom:sim-stateful-probe
contract UserProbe is BaseDeclarativeProbe {
    Store store;
    constructor() {
        store = Store(simSetPersistentStorageContractCode(type(Store).runtimeCode));
    }

    function postBlock() public {
        simEmitToSchema_stateful_invocation_count(
            SchemaStateful_invocation_countColumns({
                invocation: uint64(store.getCounter()),
                block_number: uint64(block.number),
                global_counter: simGlobalCounter()
            })
        );
        store.increment();
    }
}
If you're playing around with stateful lambdas, hit us up on Telegram as we'd love to learn more from your application!
FAQ
- When should I hook on an address versus an ABI?
- If you're interested in execution on a specific contract, hook on its address. If you're interested in execution on all contracts with the same ABI (or source code), hook on the ABI!
- Will ABI hooks work on contracts deployed after the lambda was created?
- Yes! As contracts are deployed to the chain, whether verified or not, the lambda hooks on them.
- Can I hook on multiple contracts or have multiple hooks in the same lambda?
- Yes, you can. You can hook on multiple contracts, have multiple hooks and multiple hook types all within one lambda. Whether you should use one lambda or multiple lambdas depends on your use case. Unsure? Reach out.
- Can the same lambda work across different chains?
- Yes: depending on your hooks, your lambda can work across different chains. We use this approach in many of our core tables, e.g., https://studio.sim.io/canvases/57c1df0b-5ab7-472e-abd8-4253f8feca76.
- Can I call contracts from within the lambda?
- Absolutely! Think of your lambda as a contract with sudo access. It behaves similarly to normal contracts and can call other contracts. It's also augmented with special simFunctions, which allow you to read, alter and decode the storage of other contracts; get the transaction hash and much more. We keep adding simFunctions—you can find the current list here: https://docs.sim.io/reference/
- Can I hook on multiple events/functions in the same txn?
- Yes you can! You can save variables in lambda's ephemeral storage and modify/use them from multiple callbacks. We do this in the sim Explore homepage to emit call/txn counts for each block: https://studio.sim.io/canvases/520c88e1-6b30-4617-98fa-a7e3ef646d60.
- For how long will the ephemeral storage be persisted in the lambda's storage?
- By default, they are stateful only within the block, and reset between blocks. We did recently introduce stateful lambdas. While still experimental, these let you define variables in a separate Store contract that will persist across blocks. If you want to give it a try, reach out or read more: https://docs.sim.io/docs/evm-lambda#stateful-lambdas
- What happens if a contract I hooked on has been upgraded?
- Your lambda will continue to work if what you hooked on is unchanged. For example, if you hook on a call from/to a contract, an upgrade won't impact it. If you hook on a specific function, you're fine so long as that function signature remains in the upgraded contract. If you hook on an event and the event signature changes, your hook will no longer trigger, but you can easily add the new event as a new hook.
- Do lambdas work on proxies?
- They certainly do. Lambdas automatically detect a proxy's implementation and hook on it. When hooking on a proxy, you get a "merged" ABI of the proxy and its imp. Proxy ↔ imp relationships are currently one-to-one. Contracts that make use of multiple implementations at the same time (a.k.a. "Diamond patterns") won't be handled correctly. We have solutions in mind and will prioritize based on demand—let us know if you'd benefit from it.
- What if I want to emit an array, or some other type that isn't supported in the schema?
- You can define custom types! Read more here.
Updated 8 months ago