4. A simple API
In this tutorial, we'll build out a complete (but simple!) canvas with an API for ERC20 balance change data.
Requirements: You've already created your user account and an organization and are familiar with the basics covered in3. Hello, lambda!
This tutorial takes you through a full data pipeline. For some use cases, you may be able to build your API on existing tables, or even use sim's fully configurable API templates. Before we jump into the full pipeline, here's a video on API templates:
Steps
EVM lambda and schema
- Create a new canvas. Using the expansible left canvas sidebar, add an EVM Lambda and a Schema component. Drag an edge from the right border of the Code component to the left border of the Schema component to connect them.
- We're going to emit data for ERC20 balance changes. Name the schema
erc20_balance_changesand populate the schema per the following table and then hit Save. Note that you can also define and edit schemas within the EVM Lambda, which is handy when you don't know at the outset the exact data or types you wish to emit.
| Name | Type |
|---|---|
| txn_hash | bytes32 |
| block_number | uint64 |
| token_address | address |
| account_address | address |
| value_before | uint256 |
| value_after | uint256 |
- Open the IDE in the EVM lambda component with the edit button.
- In the Add hooks flow, select ABI. Then select Classification and ERC20. Note that this means any hook you select will be triggered against each contract whose ABI includes the functions and logs in the ERC20 classification.
- Because we want to emit data about ERC20 balance changes, we'll use the erc20_balances storage hook to insert our code after each balance change. Leave the callback name default:
postErc20_balancesStorageand hit Add hook. - Place your cursor within the callback in the code-editor and insert your schema function into the lambda code by hitting the
->next to the schema.
Solidity + abstractions (ctx and simFunctions)When it comes to defining the data you wish to emit, your code is a Solidity smart contract. Anything you can do in Solidity, you can do within your callbacks. But we also provide two sets of abstractions to make the work easier and enable use cases that would otherwise be impossible:
- Hook context (ctx): For each hook, we pass a struct to the callback containing data you're likely to need for that hook. You can see the options in autocomplete by typing
ctx.within the callback.- simFunctions: Some things are easy in Solidity; if you want the block number, just do
block.number. Others are hard; there's no direct way in Solidity to access the transaction hash from within the executing contract because the transaction hash can only be determined after the transaction is signed and broadcasted, which is outside the scope of what's accessible during contract execution. So we just give it to you insimTransactionHash(). You can see all the available simFunctions in the simFunction IDE sidebar and read their documentation here.The two abstractions have some overlap: you could get the transaction hash in the case of this example either via
simTransactionHash()orctx.txn.hash(). But generally speaking thectxis for data that's very specific to the hook and simFunctions provide more general functionality.
- For the purposes of this exercise, populate your schema function, within the callback, with the following code.
    function postErc20_balancesStorage() public {
        postErc20_balancesStorageContext storage ctx = getPostErc20_balancesStorageContext();
        simEmitToSchema_erc20_balance_changes(
            SchemaErc20_balance_changesColumns({
                txn_hash: ctx.txn.hash(),
                block_number: uint64(block.number),
                token_address: ctx.txn.to(),
                account_address: ctx.path.owner,
                value_before: ctx.valueBefore,
                value_after: ctx.valueAfter
            })
        );
    }
(Internal) transaction scopingWhen you use a simFunction relating to transaction context, or a context object like
ctx.txn.to(), it is scoped to the deepest currently executing internal transaction in the hook, unless otherwise noted. Even though an ERC20 token address is often not the recipient of an external transaction that changes balances, it is the recipient of an internal transaction therein in which the balance change takes place, meaning the logic above identifies thetoken_addresscorrectly in all cases.
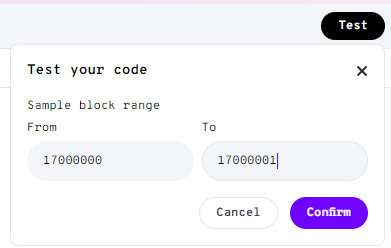
- Test the interaction. Any block range will work for this because ERC20 transfers are so common. When you hit Confirm, you should see many ERC20 transfers in the IDE console log.

Test interactionsWhen you test within the IDE, both
simConsoleLog()andsimEmitToSchema_[schema_name]populate to the console.
Data source and persistence
We now have a functioning, tested lambda. We want to take the next step by defining the full block range upon which we want to run the code and the persistence where we want to store the data.
-
Close the IDE with the X next to the Test button.
-
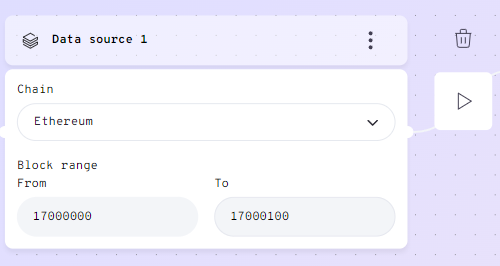
Add a Data source component to the left of the Code component. You can do this by clicking on the code component, dragging to the desired location, and releasing. Draw an edge from the right of the new Data source component to the left of the existing Code component.
-
Add a Persistence component to the right of the Schema component. Draw an edge from the right of the existing Schema component to the left of the new Persistence component.
-
Name the table in the persistence component
erc20_balance_changesand hit Set. Note that the primary key is used only for avoiding duplicates, not as an index. In this case, we needn't worry about duplicates, so there is no need to set a primary key by checking any of the checkboxes. -
In the Data source component, set a block range that you wish to run on. If you don't specify an end block, it will keep running to and at the tip. For the purposes of this tutorial, use a small range and then hit the triangle Play button.
-

While executing, you can hover over the
(!)button to see the execution status. With a small block range, it will complete very quickly.
Query
Now that we have some data in the persistence, we can query it!
- Open the query editor using the icon in the left sidebar.
- Create a new query using the button at the top right of the query editor. Now let's write a SQL query. To reference your table, you must use
@org.[table_name]. Here's a sample query that you can run to see results.
select *
from @org.erc20_balance_changes
where token_address = '0xa0b86991c6218b36c1d19d4a2e9eb0ce3606eb48'
and block_number = 17000001
limit 5
API
- Now, let's close the the query editor using the
xat top-right and add anAPIcomponent to the canvas. The API doesn't need to be connected to any other components, and can be placed anywhere. - We'll build an API that returns all balance change records for a given token and block that's specified in the request. We'll also allow the user to specify the max number of records they want back. To do this, we use
$parametersyntax. Here's the query to put into the API component.
select *
from @org.erc20_balance_changes
where token_address = $token
and block_number = $block
limit $limit- In the API component, below the query input, three parameters will populate:
token,block, andlimit. For their types, selectaddress,uint64, anduint32, respectively. - We can also populate default values for each parameter. When you interact with the endpoint, supplying values for parameters with default values is optional--if unspecified, the API will use the default. For now, let's use
0xa0b86991c6218b36c1d19d4a2e9eb0ce3606eb48,17000001, and1respectively. - You can test the query or just go ahead and close it and hit
Seton the API. The toggle at the top-right of the component will automatically toggle to the activated state. From the menu at the top right, selectCopy cURL requestand paste it into a terminal. It should look something like this:
curl --location https://api.evm.storage/canvas_api.v1.CanvasApiService/Query --header 'Content-Type: application/json' --data '{
    "canvas_id": "b9de2bff-6a97-4b08-a91f-577198dc5576",
    "api_endpoint": "api_1",
    "api_key": "sim-api-b22b5d53e81c6239",
    "query_parameters": {"token":"0xa0b86991c6218b36c1d19d4a2e9eb0ce3606eb48","block":"17000001","limit":"1"}
}
'- Run it in the terminal and you'll get a response. Because the parameters had default values, this also works:
curl --location https://api.evm.storage/canvas_api.v1.CanvasApiService/Query --header 'Content-Type: application/json' --data '{
    "canvas_id": "b9de2bff-6a97-4b08-a91f-577198dc5576",
    "api_endpoint": "api_1",
    "api_key": "sim-api-b22b5d53e81c6239",
    "query_parameters": {}
}
'
cURL requests on WindowsCopy cURL request generates a multiline Bash request that, when given parameters, should work well on UNIX/Linux systems, including Apple. If you're using Windows, Command Prompt doesn't like the newlines and PowerShell uses a
Invoke-RestMethodinstead ofcurl. Just give an AI assistant the supplied cURL request and ask it to reformat it for Command Prompt--consider this your punishment for using Windows. Another option, which some of us like, is to use Linux on Windows via WSL.
Recap: In this tutorial, we built an API that served records for every ERC20 balance change for a user-supplied contract and block number.
Updated 9 months ago